
Line 2 <Area 2>
Line 2 <Area 2> is a map in Kerning City Subway, Victoria Island. Monsters here are level 21 to 48: Wraith, Jr. Wraith and Jr. Necki.
- Mob types
- 3
- Spawns
- 107
- EXP on map
- 9,768
- Exits
- 2
Map, portals and spawns
Tap a number or letter to see where it goes.
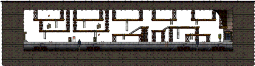
Ways out(2)
- Left side · lower levelunmarked portal · not tested
You arrive on the right side, lower level.
- Right side · lower levelunmarked portal · not tested
You arrive on the left side, lower level.
Monsters(3)
Also here
- 14 ladders
Minimap from the game files. Positions are from the game files, not tested in Classic World. Portal kinds come from type names in the game files; kinds marked "not tested" have not been checked in Classic World. An unmarked portal has no portal graphic, so the way in may be a door drawn in the scenery.
How to get here
From the nearest towns
From Kerning City5 maps
- Step 1Subway Ticketing BoothIn Kerning City, take11Middle · lower level
You arrive on the left side, upper level.
- Step 2Line 1 <Area 1>In Subway Ticketing Booth, take2Right side · lower level
You arrive on the left side, lower level.
- Step 3Transfer AreaIn Line 1 <Area 1>, take2Right side · lower level
You arrive on the left side, middle level.
- Step 4Line 2 <Area 1>In Transfer Area, take2Right side · lower level
You arrive on the left side, lower level.
- Step 5Line 2 <Area 2>In Line 2 <Area 1>, take2Right side · lower level
You arrive on the left side, lower level.
From Perion11 maps
- In Perion, take1Left side · lower level
You arrive on the right side, lower level.
- Step 2West Rocky Mountain IIn West Street Corner of Perion, take1Left side · lower level
You arrive on the right side, middle level.
- Step 3West Domain of PerionIn West Rocky Mountain I, take1Left side · middle level
You arrive on the right side, upper level.
- In West Domain of Perion, take1Left side · lower level
You arrive on the right side, lower level.
- Step 5Sunset SkyIn Construction Site North of Kerning City, take1Left side · lower level
You arrive on the right side, lower level.
- In Sunset Sky, take1Left side · lower level
You arrive on the right side, middle level.
- Step 7Subway Ticketing BoothIn Kerning City, take11Middle · lower level
You arrive on the left side, upper level.
- Step 8Line 1 <Area 1>In Subway Ticketing Booth, take2Right side · lower level
You arrive on the left side, lower level.
- Step 9Transfer AreaIn Line 1 <Area 1>, take2Right side · lower level
You arrive on the left side, middle level.
- Step 10Line 2 <Area 1>In Transfer Area, take2Right side · lower level
You arrive on the left side, lower level.
- Step 11Line 2 <Area 2>In Line 2 <Area 1>, take2Right side · lower level
You arrive on the left side, lower level.
From Sleepywood14 maps
- In Sleepywood, take1Left side · middle level
You arrive on the right side, lower level.
- Step 2Deep ForestIn Swampy Land in a Deep Forest, take3Right side · upper level
You arrive on the right side, lower level.
- Step 3Damp Tree-ForestIn Deep Forest, take1Left side · upper level
You arrive on the right side, lower level.
- Step 4Dangerous Croko IIIn Damp Tree-Forest, take1Left side · middle level
You arrive on the right side, lower level.
- Step 5Dangerous Croko IIn Dangerous Croko II, take1Left side · lower level
You arrive on the right side, lower level.
- Step 6The Swamp of Despair IIIIn Dangerous Croko I, take1Left side · lower level
You arrive on the right side, lower level.
- Step 7The Swamp of Despair IIIn The Swamp of Despair III, take1Left side · lower level
You arrive on the right side, lower level.
- Step 8The Swamp of Despair IIn The Swamp of Despair II, take1Left side · lower level
You arrive on the right side, lower level.
- In The Swamp of Despair I, take1Left side · lower level
You arrive on the left side, lower level.
- Step 10Subway Ticketing BoothIn Kerning City, take11Middle · lower level
You arrive on the left side, upper level.
- Step 11Line 1 <Area 1>In Subway Ticketing Booth, take2Right side · lower level
You arrive on the left side, lower level.
- Step 12Transfer AreaIn Line 1 <Area 1>, take2Right side · lower level
You arrive on the left side, middle level.
- Step 13Line 2 <Area 1>In Transfer Area, take2Right side · lower level
You arrive on the left side, lower level.
- Step 14Line 2 <Area 2>In Line 2 <Area 1>, take2Right side · lower level
You arrive on the left side, lower level.
Maps with a portal to Line 2 <Area 2> (2)
Grey numbers are portals on another map: each opens that map with the portal picked out. A coloured number followed by "here" is a portal on the map above. Positions are from the game files, not tested in Classic World.


- JM From tha Streetz in Need of HelpLv 15 · Crafting
- Luke the Security GuyLv 19 · Henesys
- Dr. Faymus's RequestLv 22 · Kerning City
- Second Material Delivery for Building a New HouseLv 41 · Ellinia
- Jane's First ChallengeLv 44 · Lith Harbor
- Jane's Second ChallengeLv 44 · Lith Harbor
- A Quiet Line of WorkLv 47 · Citizenship
- Taking Out the Alligators 1Lv 48 · Perion
- Leveling guide: 1 to 100Where to train at every level, what accuracy each step needs, which maps suit which class, and how to tell when it is time to move.
- Fighter guideRage, the only multi-target Final Attack and fast 2H weapons. SP order, axe or sword, a weapon plan that works without level 30 shops, and what is known to 70.
- Page guideThe hardest single-target Final Attack, the crafted blunt line and the option of a shield. 2H blunt or 1H and shield, and when Threaten is worth its 30 SP.
- Fire/Poison Wizard guideFire Arrow for single targets, Poison Breath once three or more mobs are in the box. SP order, the choice at 41, gear to 50, and how to get through the fire-resist 50s.
- Hunter guideArrow Bomb for clusters and the faster bow line: when to use which attack, where 121 SP go, and the bows you can really get.
- Cleric guideIs Cleric worth it? What Heal, Bless and Invincible really do in Classic World, party and solo SP orders, and where a mage with a single-target attack should train.
Last updated 5 Nov 2026, from game data version 779. How we gather data